The following instructions detail how Team Avacado made Chatty Coaster. As UC Berkeley students working on a class project, we had access to a variety of fancy equipment that you may not have access to. Fear not, you can modify the instructions as necessary to create your own Chatty Coaster without fancy equipment. I will detail some thoughts on how you can do that in the instructions.
The illustrator file used to cut the base, lid, and vinyl stickers.
Materials Used for Casing
- 1 sheet general soft wood board
- 1 sheet clear acrylic
- 1 sheet copier paper
- 15 x 60 inch sheet white vinyl
- 1 4-inch diameter aluminum pipe
- 1 proto board
- 2 large plastic beads
Materials Used for Electronics
- 4 color-changing LEDs
- BM-700 Microphone
- KENYX 302 USB Recording Equipment
- 3.3V speaker
- 1 amplifier
- 1 arduino micro
- 1 photo sensor
- 10 220-ohm resistors
- 9V battery
- LM7805 Series Transistor
- Audio-sound breakout-WTV020SD
Machinery Used
- vinyl cutter
- laser cutter
- lathe
Code For Arduino
The combinedCode folder contains the library for the WTV020SD sound breakout board as well as the code for the coaster itself.
Creating the Electronics
These are the guts of the Chatty Coaster. No matter what the outside looks like, if you’ve got this, you’re good to go.
I recommend making this part first. Then you can create a casing to fit. As coasters are generally rather thin, try to minimize the height for a more professional final look.
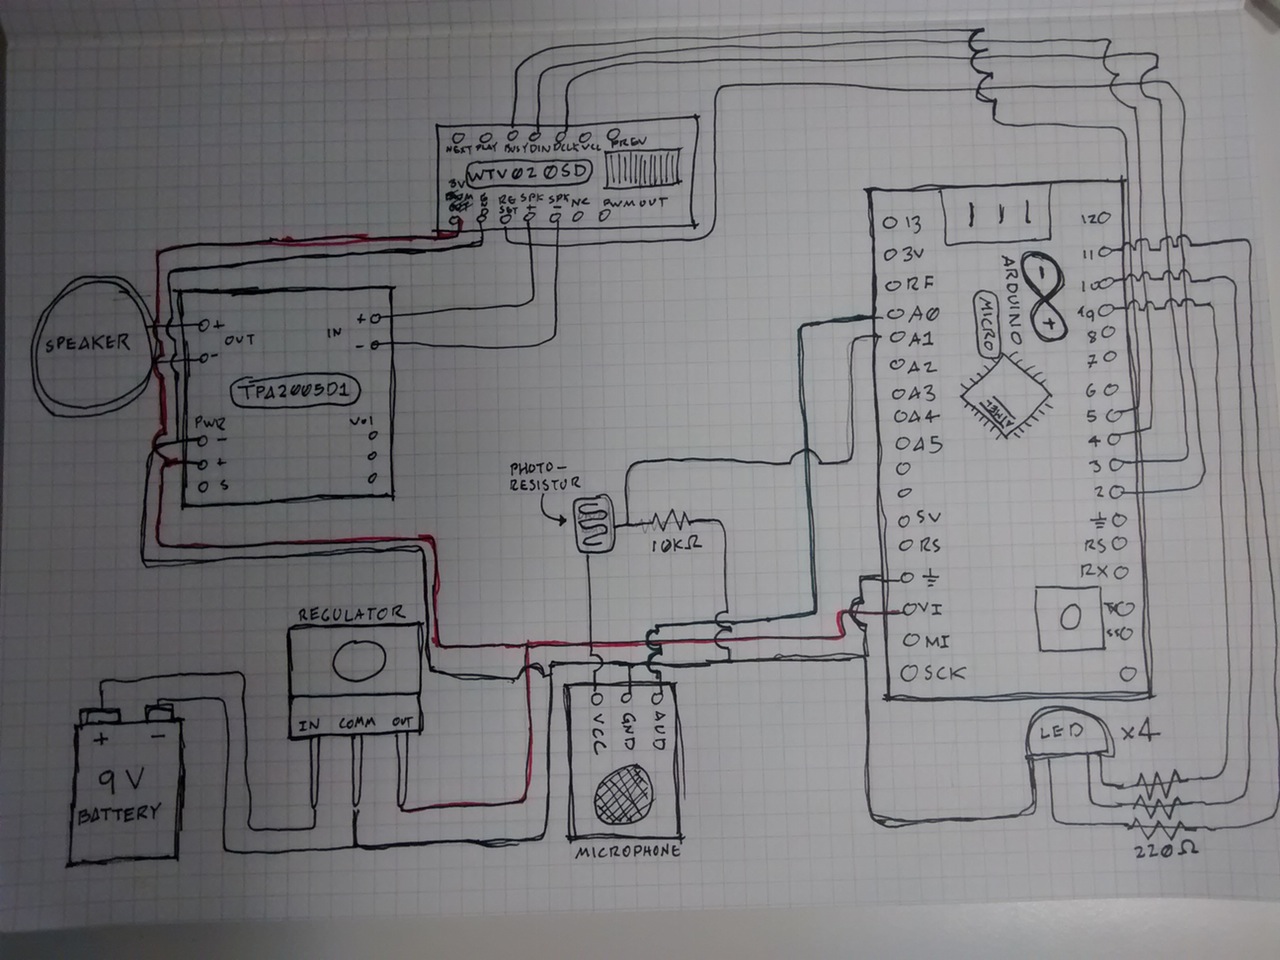
Use the following diagram to wire all the electronics together.
Create the Casing
1. Create the cylindrical body.

|
Take the aluminum pipe and lathe it down to an appropriate height for the electronics. Due to the height of the 9V battery and the diameter of the pipe we found, for us that was about 30mm high. Also lathe a little lip into one end of the pipe. This will allow you to inset the lid. |
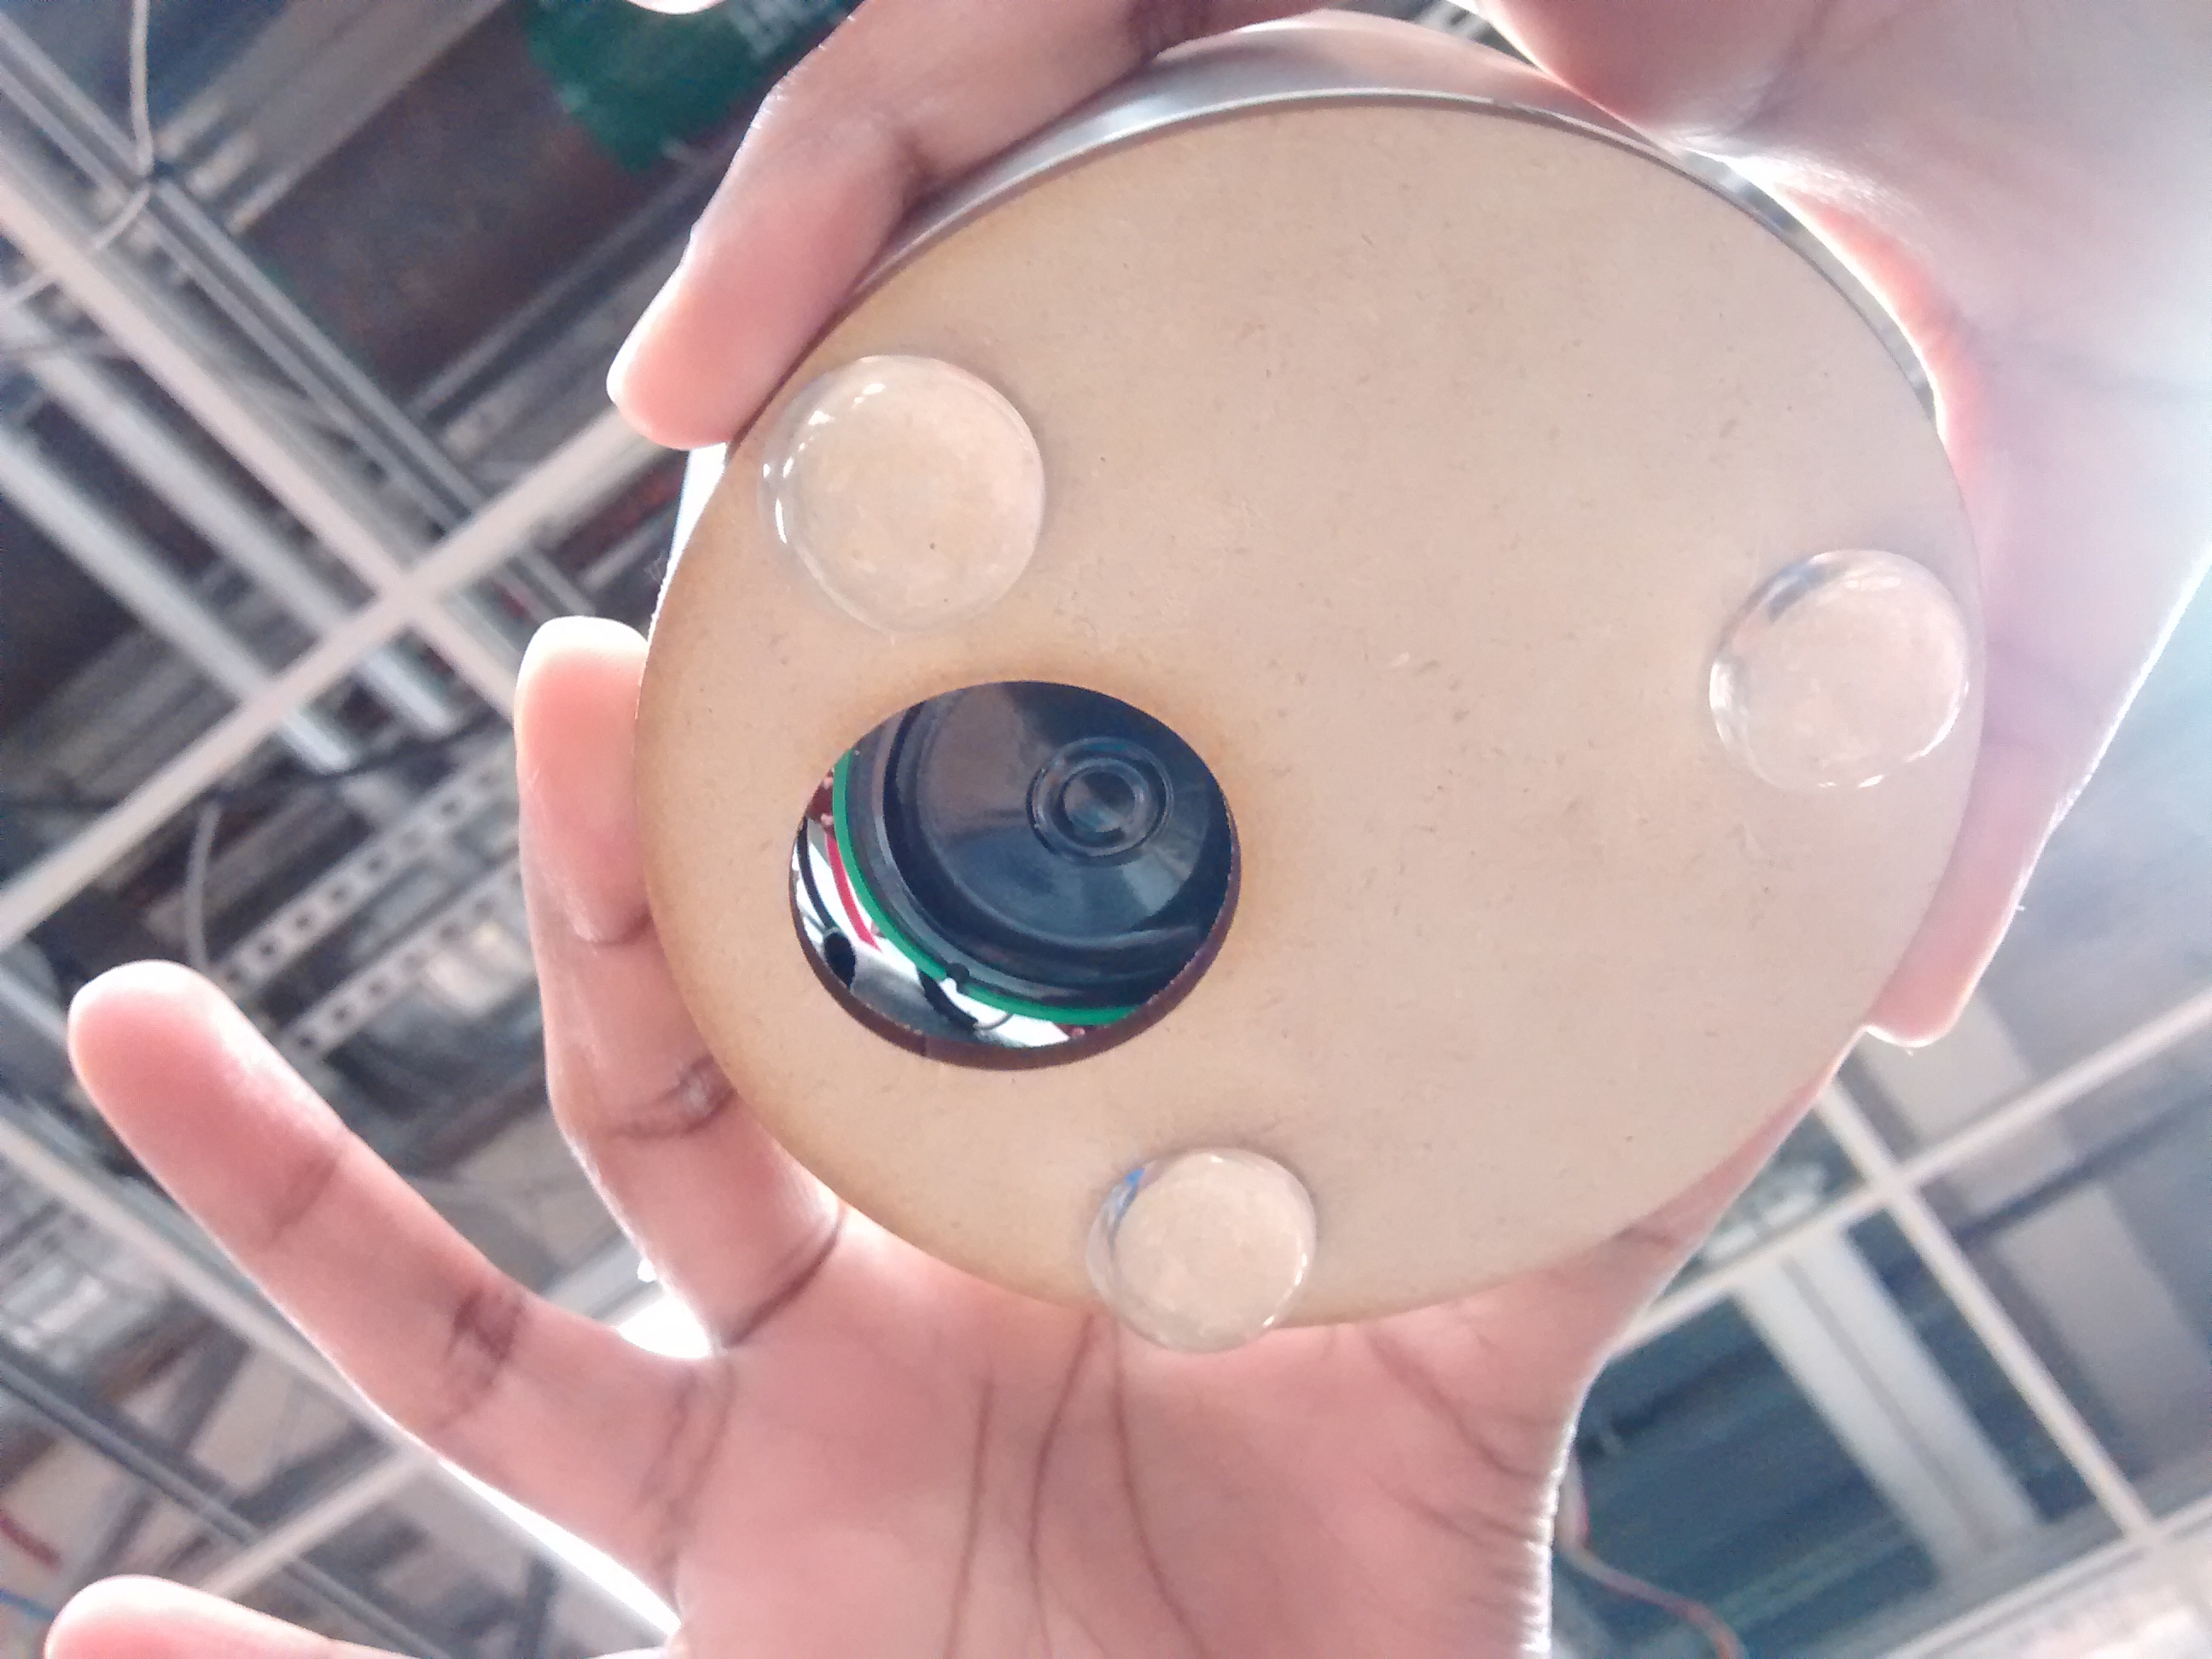
2. Cut the bottom. Cut the two beads in half each.
Use a laser cutter to cut a circle out of general soft wood board. This circle should have the same diameter as the cylindrical part of your casing.
Make sure to cut a hole in the bottom in the location of the speaker. This will allow the sound to carry better.
Glue three of the halves of the beads to the bottom of the coaster. This will hold the coaster up off the table and allow the sound from the speaker to carry properly.
3. Cut the lid
Cut a circle for the lid in the clear acrylic, using the diameter of the pipe from within the lip.
Sand the lid slightly to allow for diffusion of the light.
4. Cut the sticker for the lid.
Use the vinyl cutter to create a punctuation sticker. Place on the back of the lid.
You can use the illustrator file to cut that.
Possible Substitutions
- Make the coaster rectangular. A box-like shape is easier to create than a cylinder.
- Consider using cardboard instead of wood, acrylic, or metal. It will be easier to cut with scissors.
- Consider 3D printing the cylindrical casing
- A quaker oatmeal box and water proof paint might be good pipe alternatives.
Feel free to add your own substitution ideas or other thoughts below!